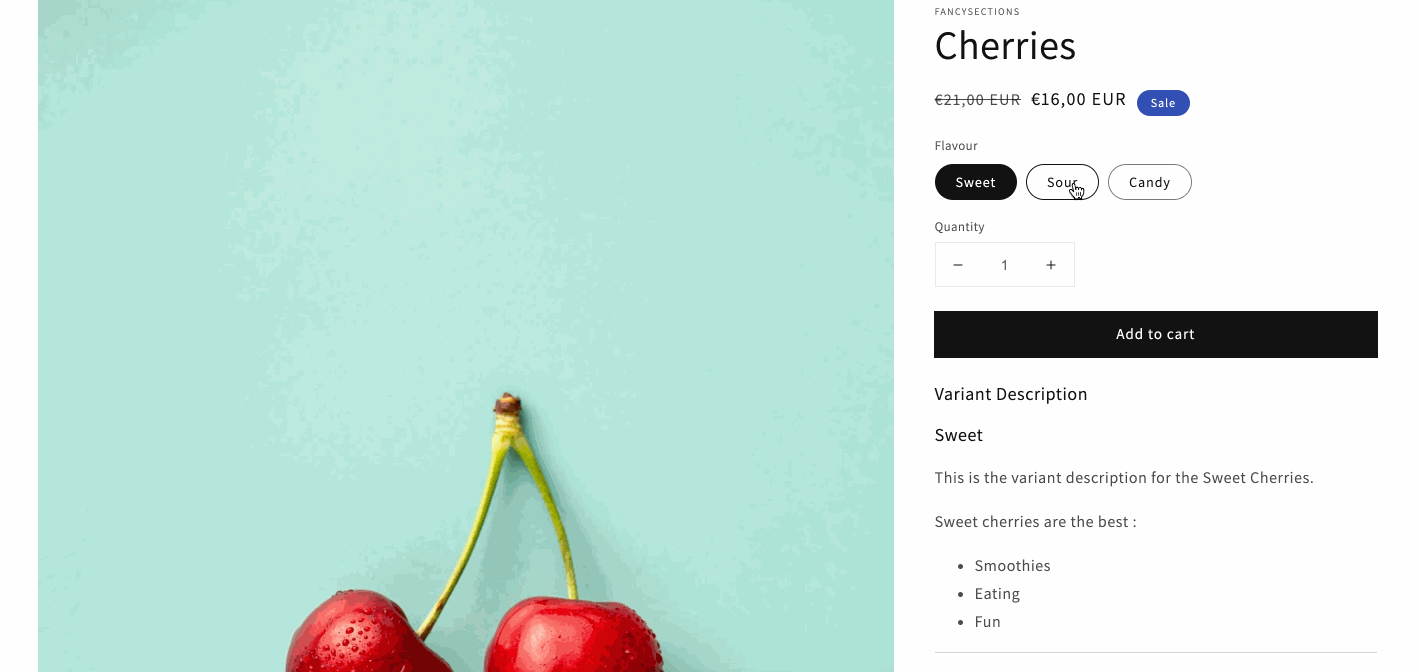
In this post we're going to be creating unique descriptions for each variant that show on variant selection.
This year at Unite, Shopify announced new, more robust metafields and we're excited 🎉.
This new metafield paradigm makes it easier for us the developers and for the merchants to set up.
Firstly, the metafields are added right in the regular admin, without the need for an app. This makes it a little less confusing for the merchant to understand how and where these metafields will be used.
https://[[your_store]].myshopify.com/admin/metafields
Now, referencing an object is more obvious for the merchant and less susceptible to these issues.
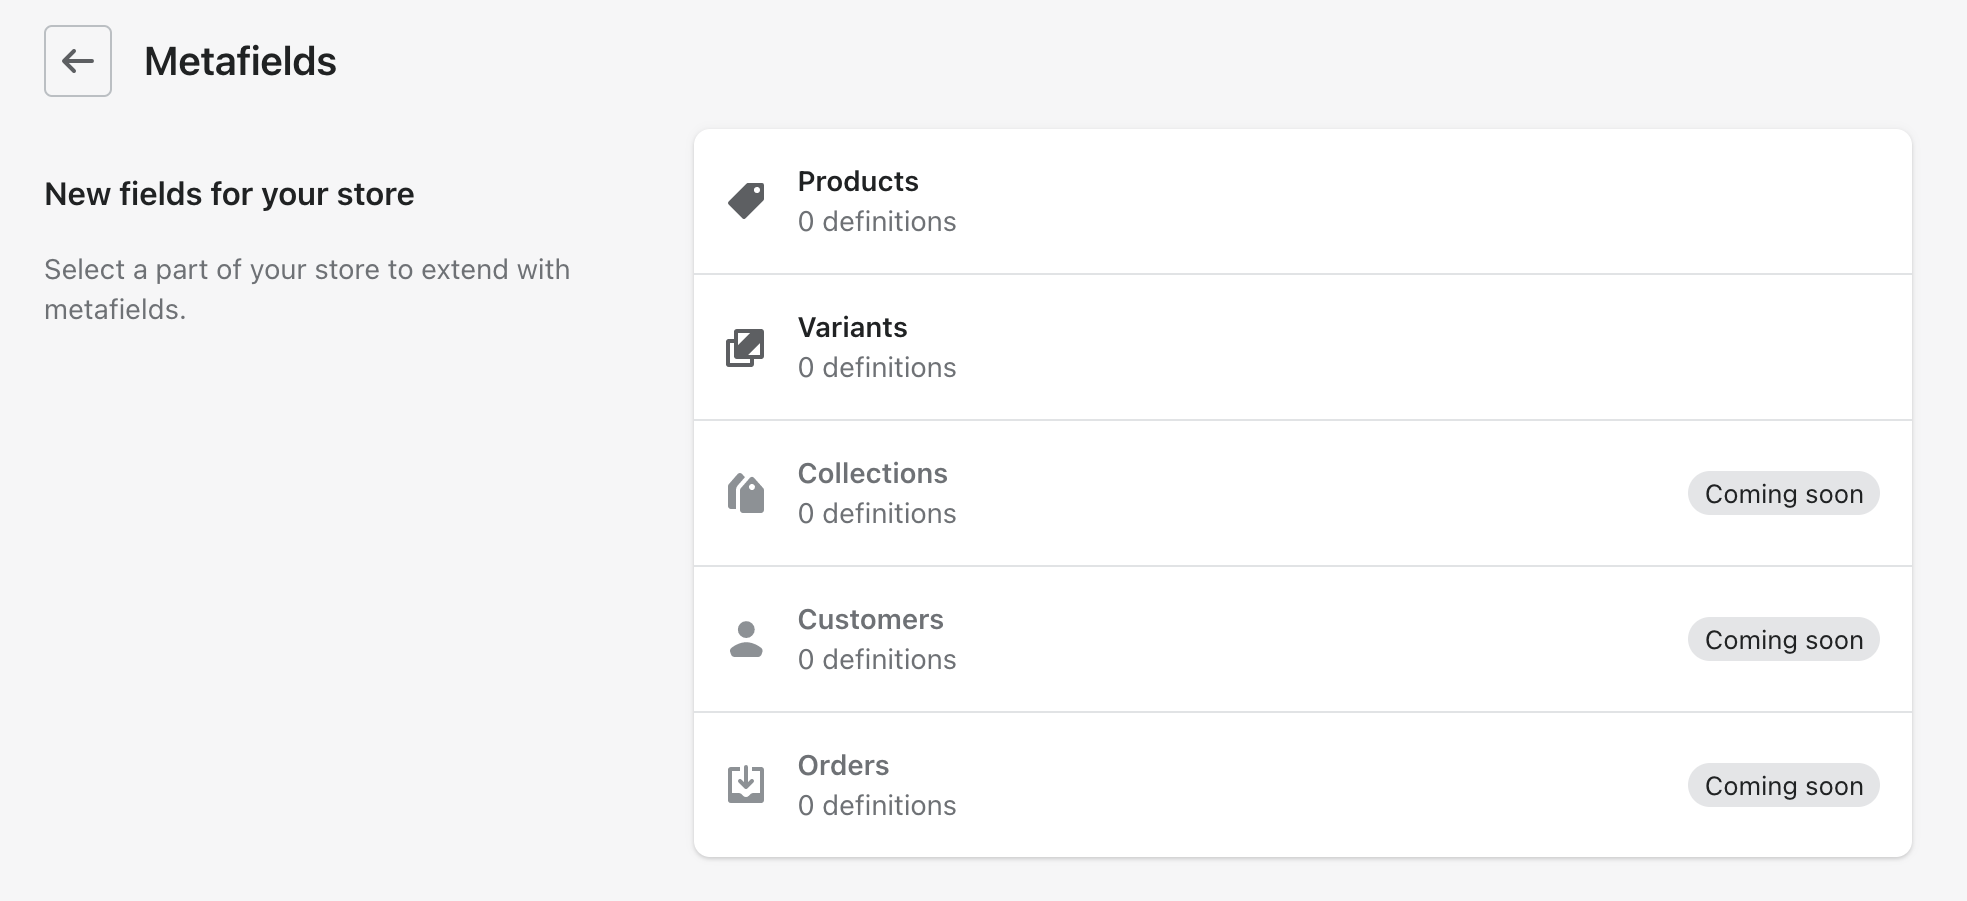
Setting up Metafields
Step 1
Go to settings and select metafields.
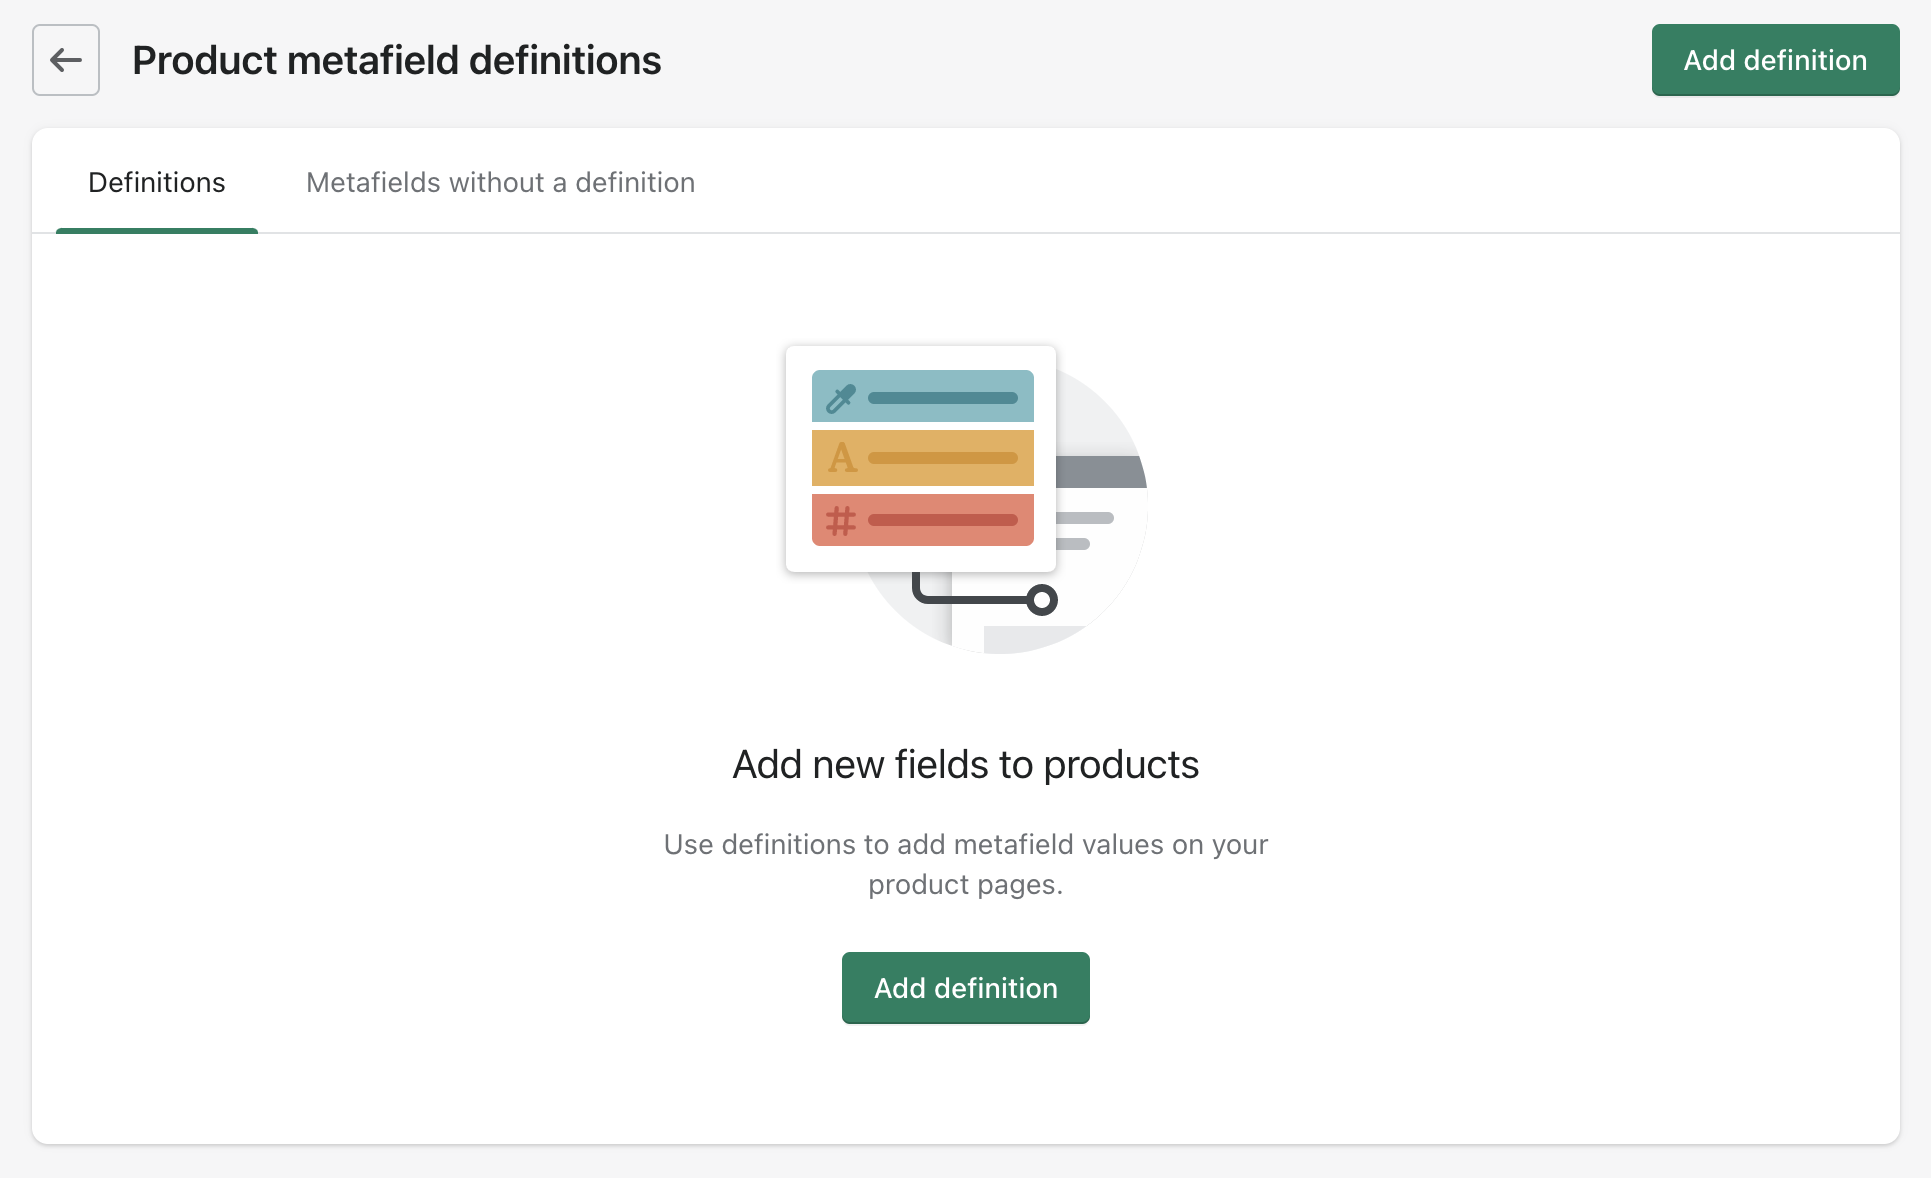
Step 2
Select what the metafield will be for.
In this case, I chose variant which means the metafields will be associated with each product variant. The metafield I'm adding is multi-line text to create a variant specific description.
Step 3
Add the metafield.
Step 4
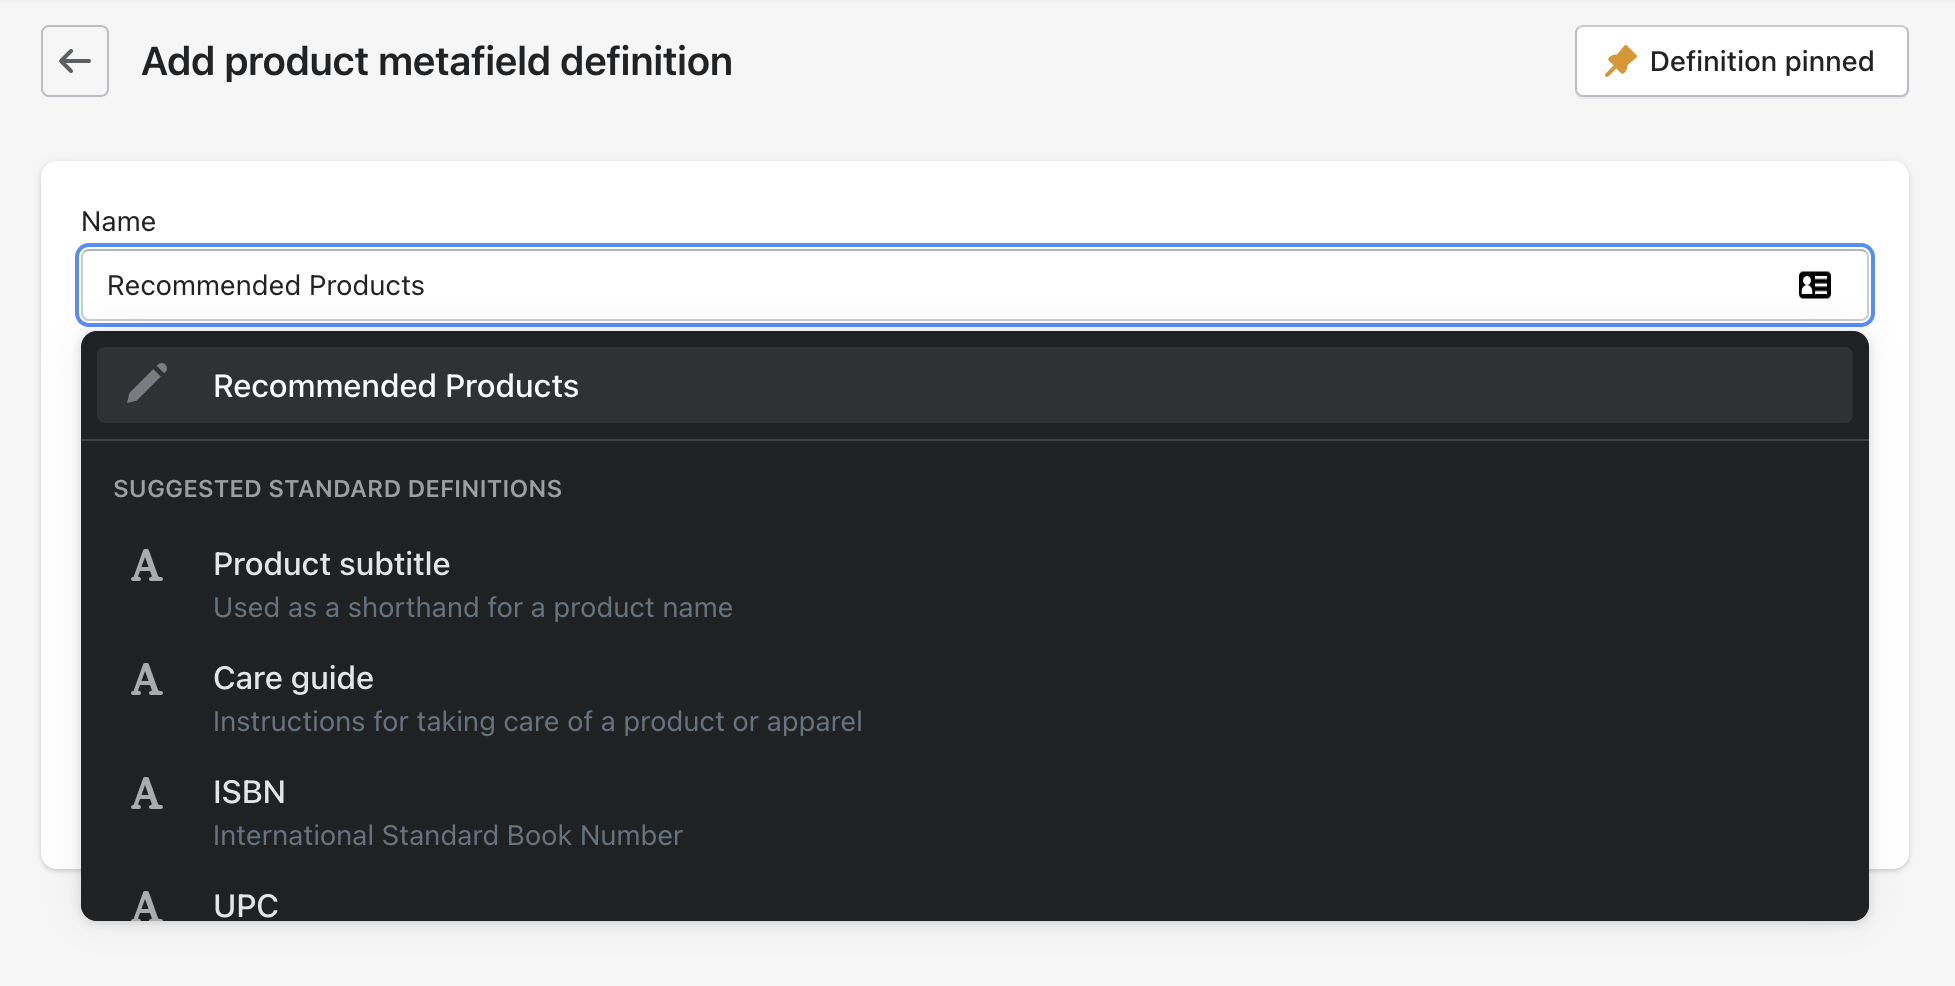
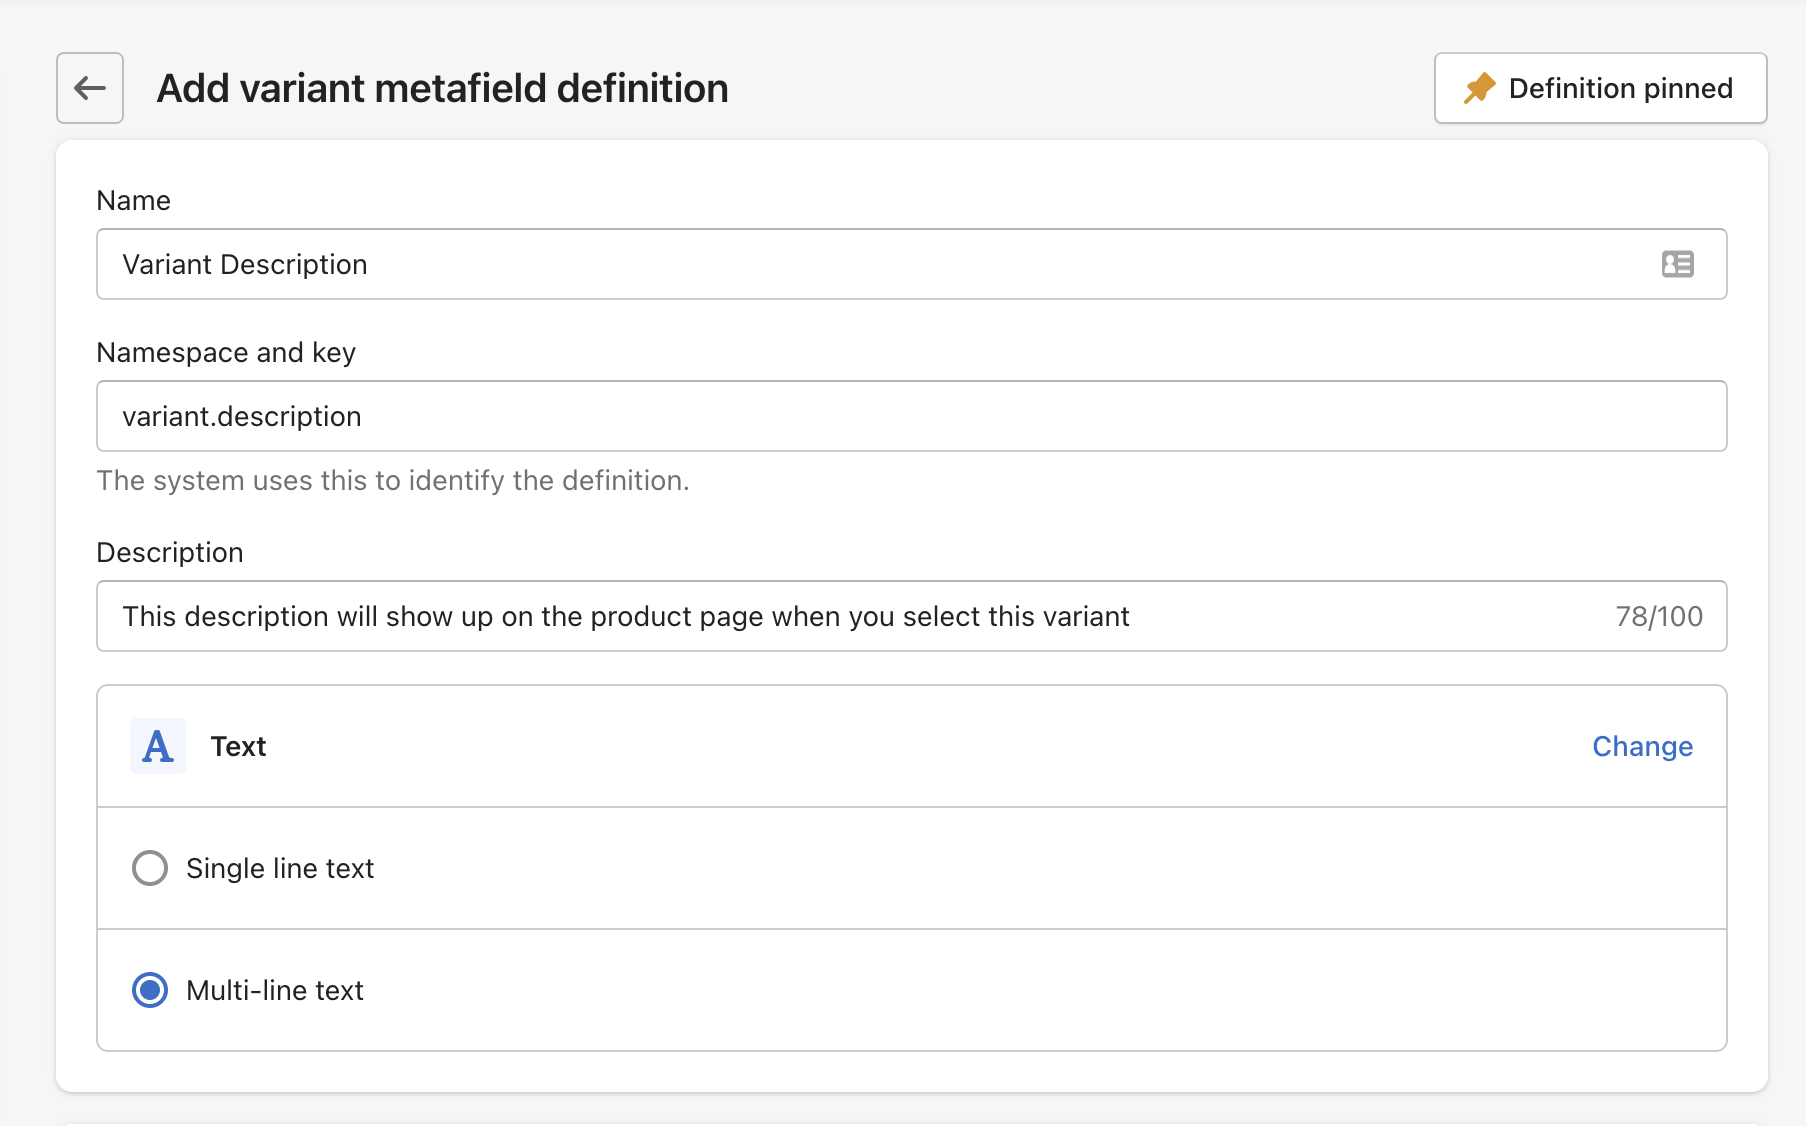
Name the metafield.
This name is meant to be human readable and will show up where you edit the variants for a product. Some recommendations are offered here.
Step 5
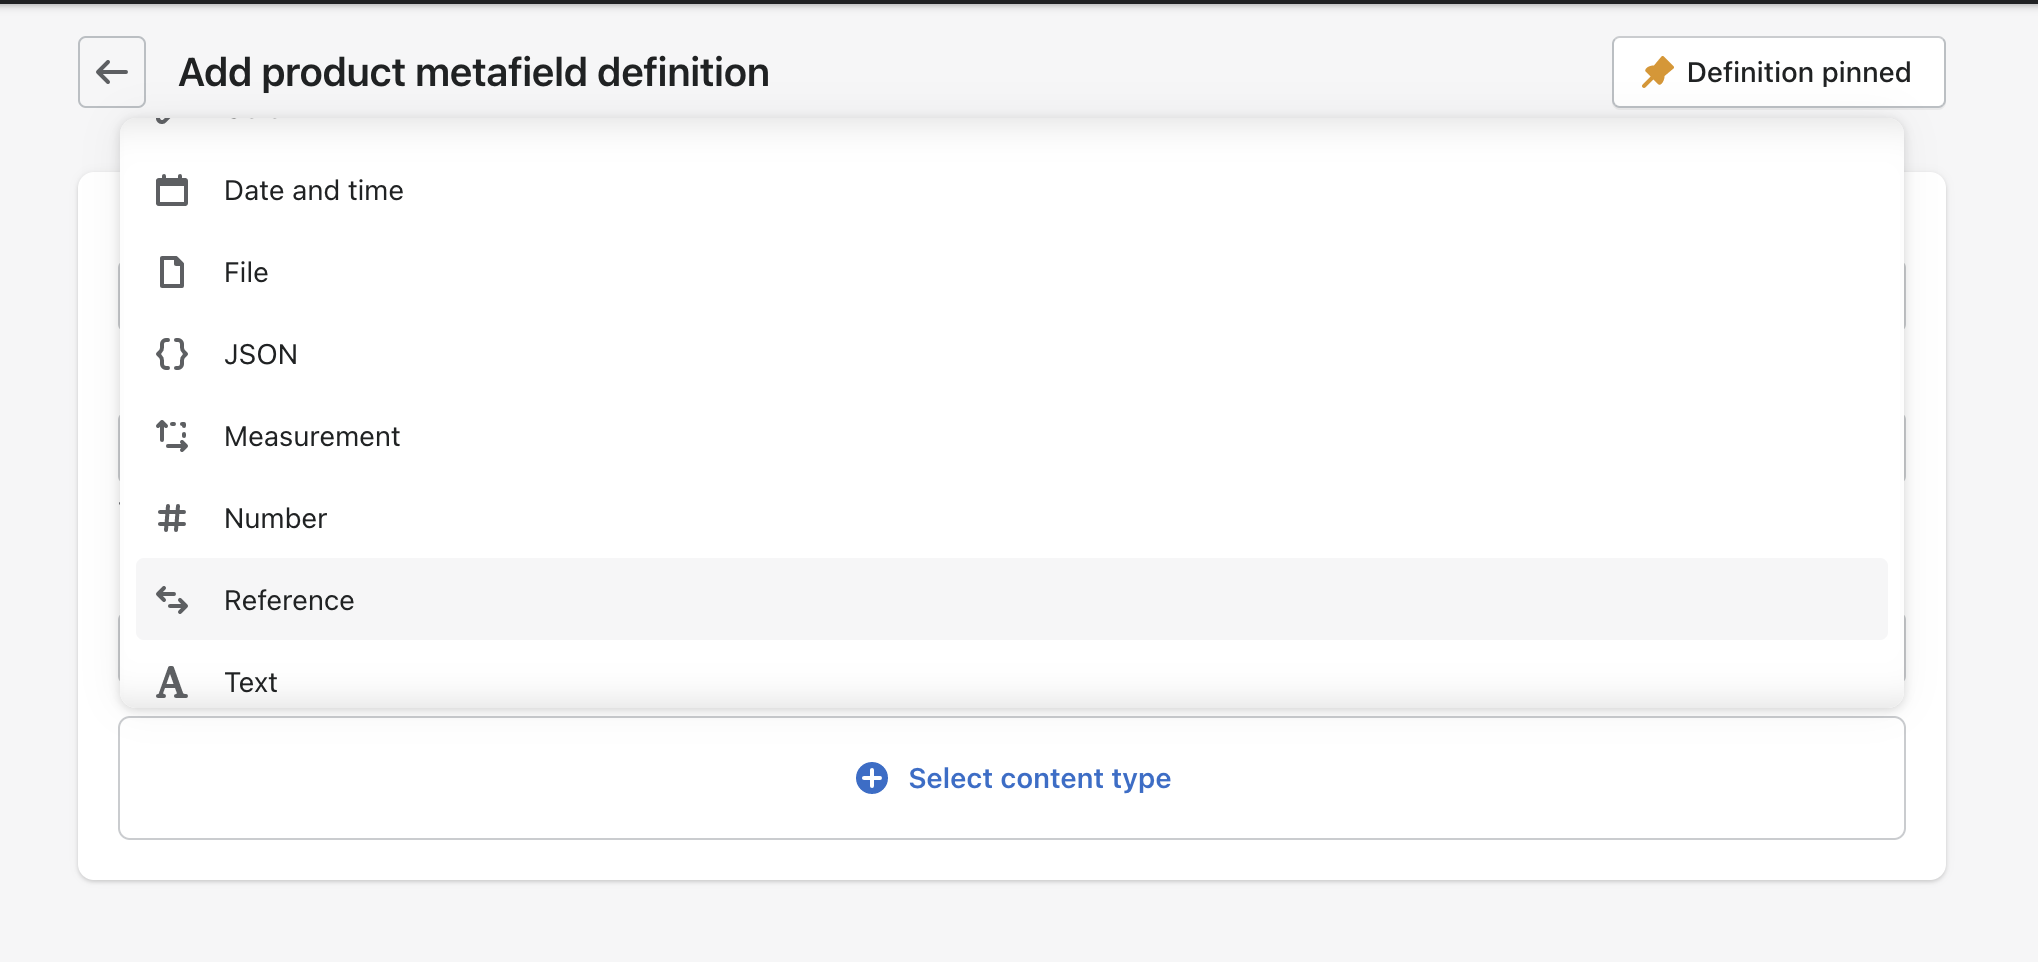
Select content type.
For the variant description we'll be using the content type Text.
Step 6
The total metafield definition.
As you can see below, the total metafield definition has the name, the namespace, the key, the description and the type.
The namespace and key is how we will reference them in the liquid.
The name and description are used to communicate with the merchant the purpose and use of the metafield.
The type is the type of metafield it is.
Using the metafield
Now that our metafield is set up we can go to the product page and select a variant to edit - in this case because in step 2 we chose the metafield to be on the product variant.
At the bottom of the product variant editing page you'll now see the option for the metafield we set up labeled with the name with gave it.

When you mouse into the grey box it opens up to be a bigger input field to add your text. You can see here the description we wrote in the definition shows up.
Unfortunately, multi-line text returns just as a simple string, so any line breaks entered will not render on the page.
✨Fortunately✨, the multi-line text will render HTML!

Accessing the Metafields with Liquid
The way we access the metafield data is no different than before. In this case the metafield is for the product variant. So we reference the variant then metafields and then access the specific metafield through the namespace and the key.
[[object]].metafields.[[namespace]].[[key]]
In practice, for the variants metafield it would look something like this on the product page
{% for variant in product.variants %}
   {{ variant.metafields.variant.description.value }}
{% endfor %}
Integrating into the product page
There are many ways to do this and it will really depend on what theme you are using. Here I'll be showing you how to integrate with Dawn the new free 2.0 theme provided by Shopify (and also available on github)
Adding liquid to the product page
In the dawn theme, the product template is called templates/product.json. This is a json template, which means all the code will be in a section. The section that we'll be modifying is sections/main-product.liquid
I searched for product.description in the file so that I could place the variant descriptions above the general product description.
  Variant Description
  {% for variant in product.variants %}

      {% if product.selected_or_first_available_variant.id == variant.id %}
        style="display: block;"
      {% endif %}
    >
      {{variant.title}}
      {{ variant.metafields.variant.description }}

  {% endfor %}
  .variant__description {
    display:none;
  }
In the above code, I loop over all the product variants with liquid. I add a class for styling and a data attribute to store the variant id. I show the variant title and the variant description coming from the metafield. Lastly, I add some liquid logic to display the variant description if it is the first or selected product - this way when we land on the page the correct variant description will be showing. I've also added display:none to the class. This means that only the description for the variant selected will show.
Updating on variant selection with JS
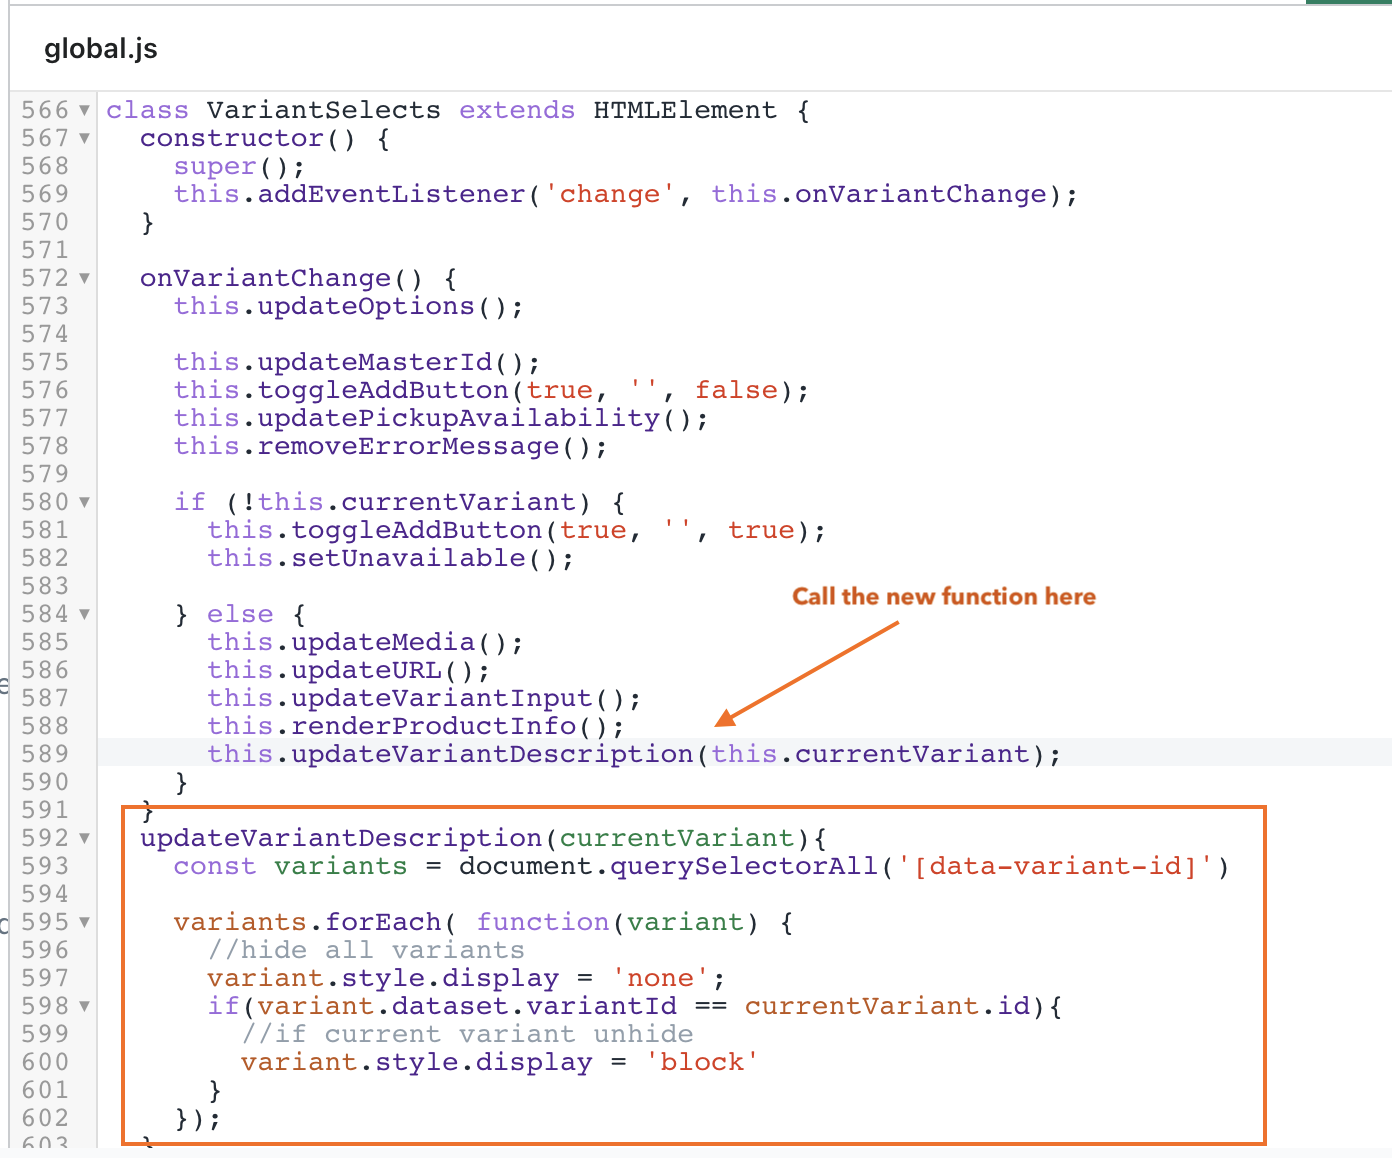
The JS for this functionality can be found in the assets/global.js file. I found the VariantSelects class and created new function updateVariantDescription.
updateVariantDescription(currentVariant){
  //find all the variant descriptions with the data attribute that we added
  const variants = document.querySelectorAll('[data-variant-id]')

  variants.forEach( function(variant) {
    //hide all variant descriptions
    variant.style.display = 'none';
    if(variant.dataset.variantId == currentVariant.id){
      //if current variant unhide the variant description
      variant.style.display = 'block'
    }
    });
}
I then call this function inside the function onVariantChange, in the part that indicates that this.currentVariant exists. Below is an image of the code integrated with the existing code from Dawn.
If you're not using Dawn, you'll need to investigate where the JS exists for variant selection and integrate it in a similar way.