Everyone loves to talk about how graphql is the next best thing since sliced bread 🍞, but when you try to get started with it, it can sometimes feel like like an uphill battle 🏔 with dependancies and libraries just to make the call in the first place.
Well, I'm here to make your life a lot easier - specifically for the Shopify Storefront API 🙌. We'll walk through the steps to set up your shop with the access, create the graphql query, and then call the query with Javascript Fetch.
💡This post has been updated to reflect the new way to get the Storefront Access Token 💡
Step 1 - Create a Private App
The first thing we need to do is create a private app. We do this by going to settings and then choosing Apps and sales channels in the sidebar.

Then we click Develop apps at the top right.

We then have to allow custom app development on the store.

They would really like you to know the implications of developing a private app and make sure you understand the Terms of Use and the security risks. It's probably a good idea to give this a read 🙂.

Now you can create a private app 🙌.

I give my app the name of storefront, so when I go back I remember what it was for 😉.

From here click Configure Storefont API scopes. This will open up a place to choose what will be accessible through the Storefont API and once that's chosen you'll finally get the Storefront Access Token

Step 2 - Create a graphql query
The easiest way to test your queries is to the Shopify Admin API GraphiQL explorer. You can add this app to your store by visiting this page and clicking the install link near the top.
Through the app, you can test out all the queries and see the results right away. The app also has built in documentation and auto-suggests queries for you.
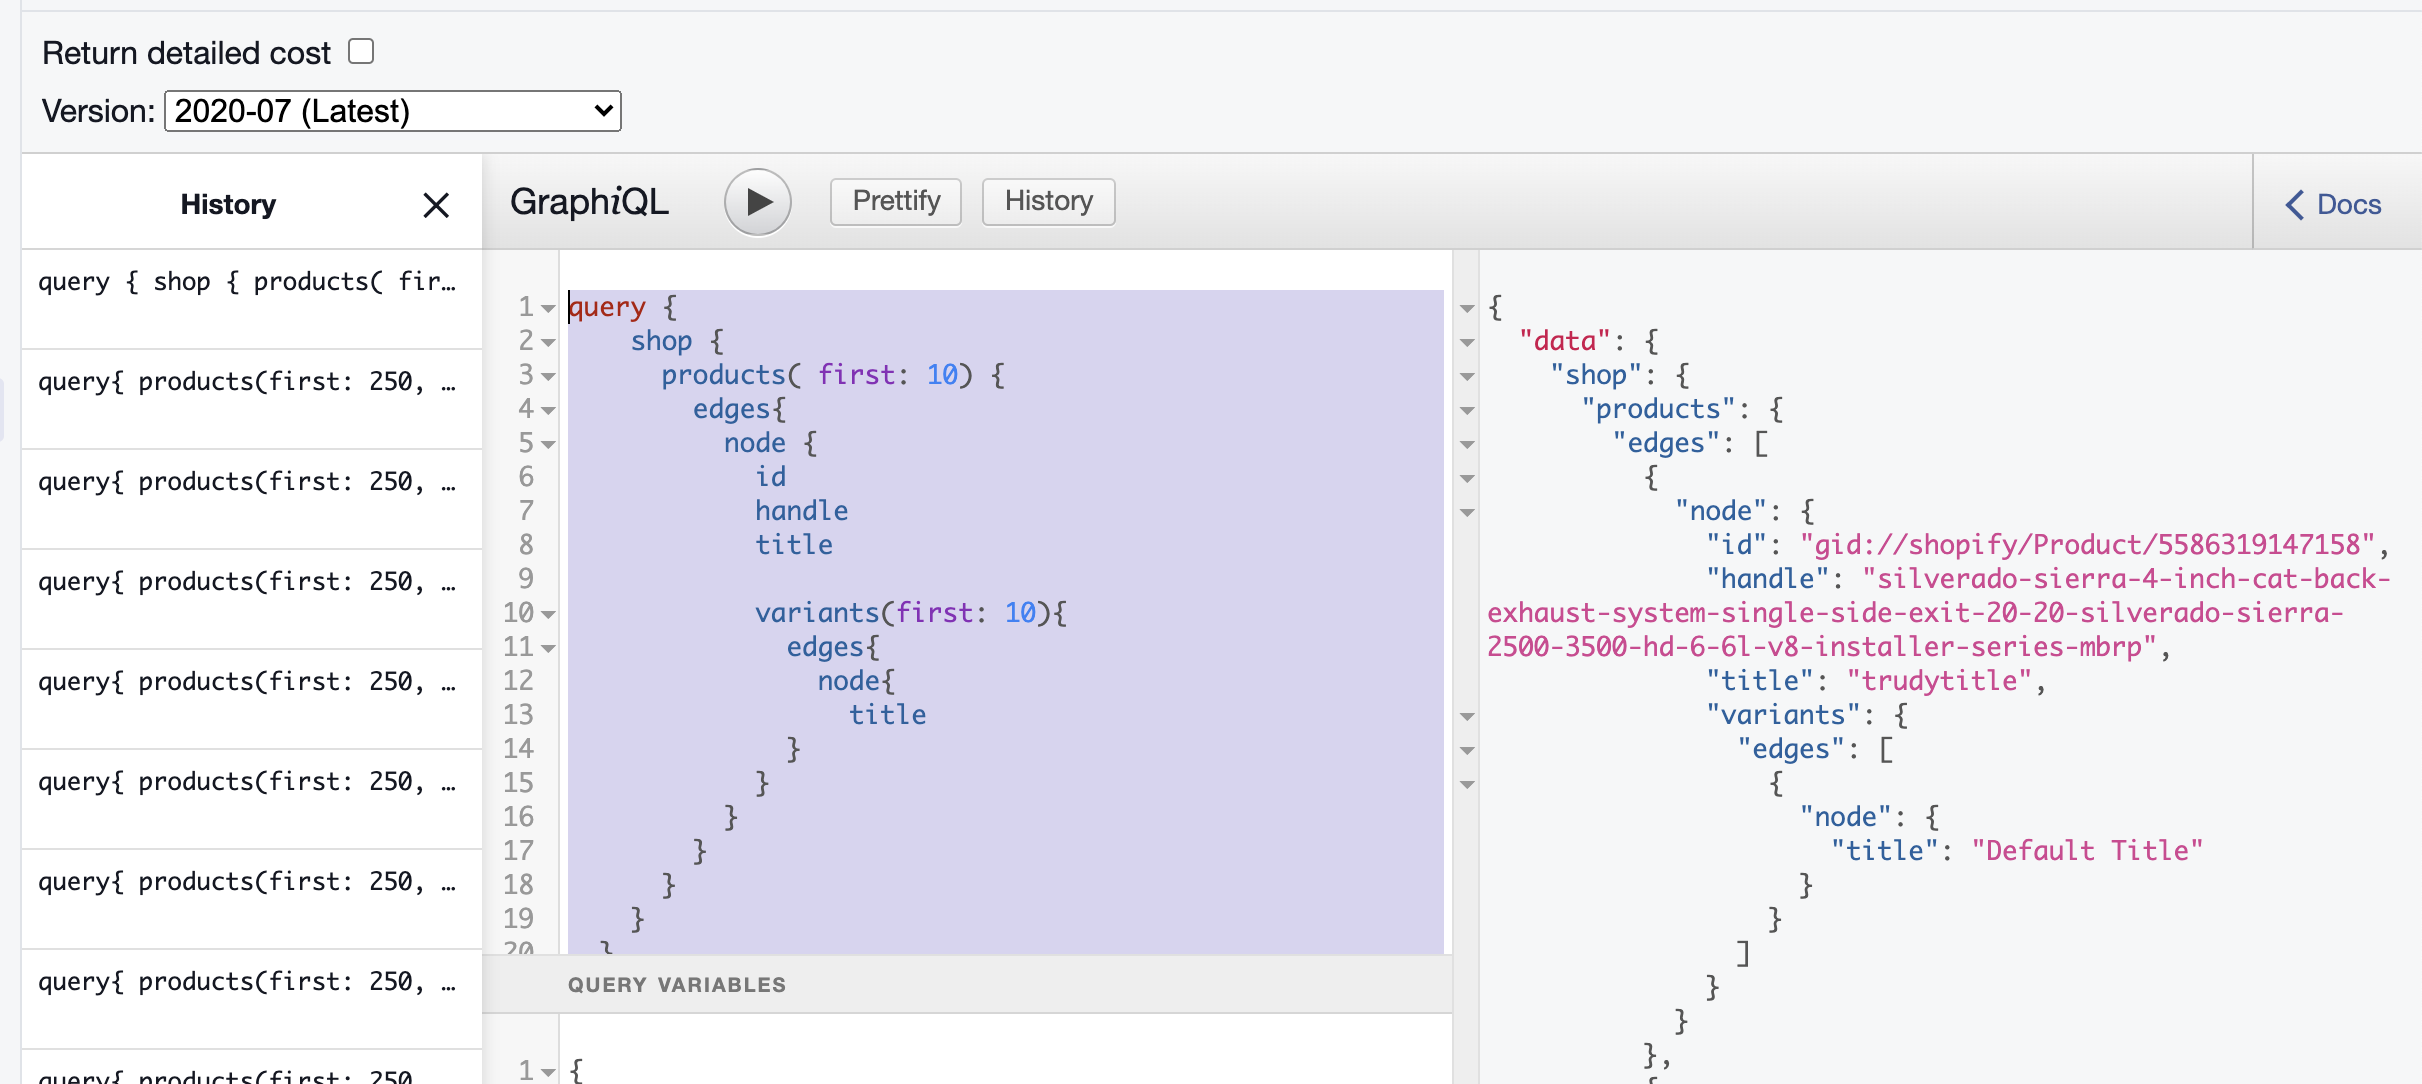
Once you have you're query set we can create a function that returns the query. (Note the back ticks for multiline strings).
  const productQuery = () => `
  query {
    shop {
      products( first: 10) {
        edges{
          node {
            id
            handle
            title

            variants(first: 10){
              edges{
                node{
                  title
              }
            }
          }
        }
      }
    }
  }
}
`;
Step 3 - Call the query with JavaScript Fetch
For the Fetch call, I first store my Storefront access token and graphql url in variables. The access token we got from step on. The graphql url is your store url + /api/{version}/graphql.json.
🔥Hot Tip: Make sure the version that you're using matches the version you're creating the queries with in the app. Otherwise there may be a mismatch in what is available.
const STOREFRONT_ACCESS_TOKEN =  'xxxxxxxxxxxxxxxxxxxxxxxxxxxxx'

const GRAPHQL_URL = 'https://teststore.myshopify.com/api/2020-07/graphql.json'
Now, we create the graphql body. The method is POST. In the headers we need to set the X-Shopify-Storefront-Access-Token to our access token and we set the content type to application/graphql. The body is set to the productQuery we created in the second step.
const GRAPHQL_BODY  = () => {
	return {
	'async': true,
	'crossDomain': true,
	'method': 'POST',
	'headers': {
		'X-Shopify-Storefront-Access-Token': STOREFRONT_ACCESS_TOKEN,
		'Content-Type': 'application/graphql',
	},
	'body': productQuery()
	};
}
Finally, we create a standard JS Fetch request with the GRAPHQL_URL and the GRAPHQL_BODY and we console log out our results - in this case the first 10 products from the store.
fetch(GRAPHQL_URL, GRAPHQL_BODY())
        .then(res => res.json())
	.then(products => {
		console.log('products', products)
	})
And 🎉Voila!🎉 you've made a request to the Storefront graphql API.
One of the great things about this is that you can make the call from inside your theme code or on any other HTML page you like.